Baked Murukku /Chakli
Baked chakli/murukku is healthy and better alternative to the traditional oil deep fried Murukku available in sweet shops and stores.
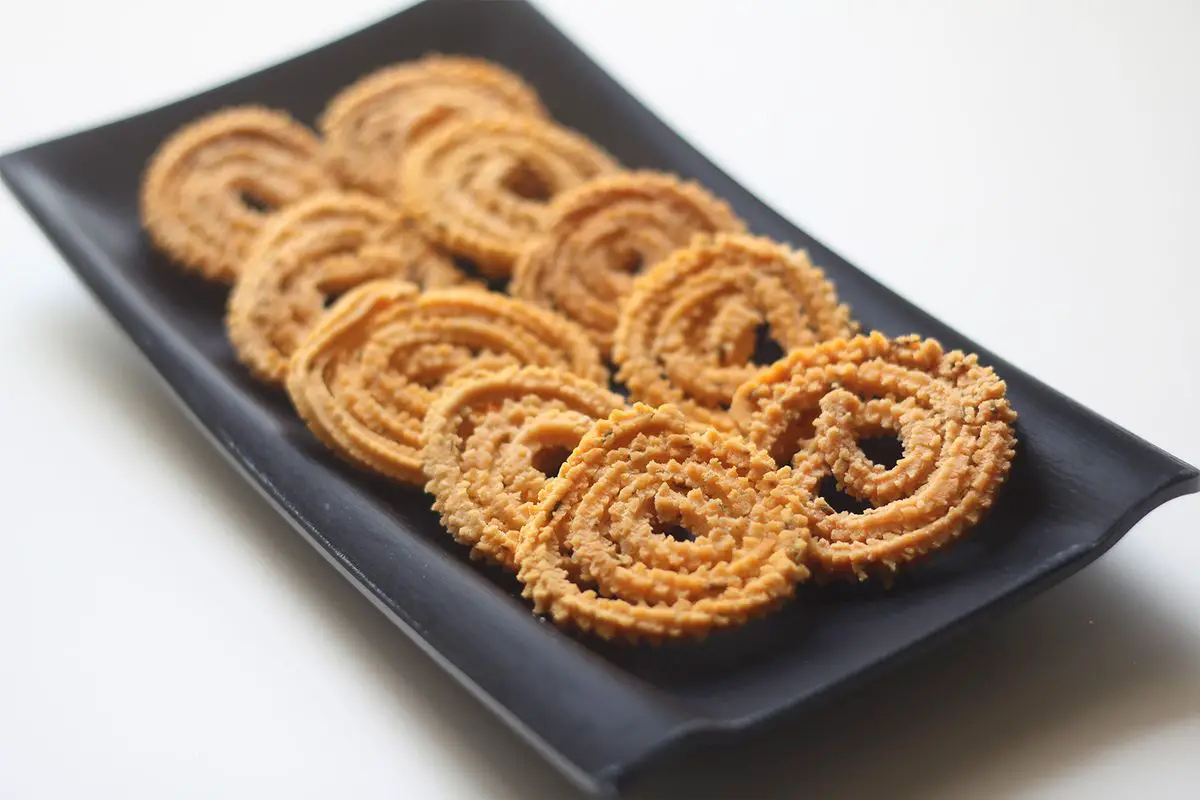
Are you a fan of Indian snacks but looking for a healthier alternative to the traditional fried murukku? Look no further! In this post, we'll introduce you to a unique twist on the classic murukku recipe - baked murukku. This recipe is not only delicious but also a healthier option that you can easily make at home. So, let's dive in and learn how to make this crispy and flavorful baked murukku!
What Is Baked Murukku?
- Baked murukku is a popular South Indian snack made with rice flour, fresh cream, and a blend of Indian spices. It is typically shaped into spiral patterns using a murukku press and then traditionally deep-fried. However, this recipe introduces a healthier alternative by baking the murukku in the oven instead. The combination of succulent fresh cream, aromatic Indian spices, and unique seasoning creates a delightful crunchy snack that is perfect for any occasion.
Why You'll Love Baked Murukku?
- Crispy and Crunchy Texture: Baking the murukku gives it a delightful crispy and crunchy texture, making it a perfect snack for any occasion.
- Healthier Alternative: Unlike traditional deep-fried murukku, the baked version is a healthier alternative as it is lower in fat and calories, making it a guilt-free snack option.
- Gluten-Free: The use of rice flour in this recipe makes it a gluten-free snack, suitable for those with gluten intolerance or celiac disease.
- Packed with Flavors: The combination of red chili powder, turmeric, cumin, and sesame seeds adds a burst of savory and spicy flavors to the murukku, making it a tasty treat for your taste buds.
- Low in Saturated Fat: By using fresh cream and minimal oil for brushing, the baked murukku is low in saturated fat, making it a heart-healthy snack choice.
- Easy to Make: This recipe is easy to make and requires minimal ingredients, making it accessible for anyone looking to enjoy homemade murukku without the hassle of deep frying.
Ingredients for Baked Murukku
- Cream: Provides a rich and creamy texture to the dough, enhancing the overall flavor of the murukku.
- Oil: Adds moisture and helps bind the ingredients together, giving the murukku a crispy texture when baked.
- Red Chilli Powder: Adds a spicy kick to the murukku, giving it a delicious and flavorful taste.
- Turmeric Powder: Imparts a vibrant yellow color to the murukku and adds a subtle earthy flavor.
- Cumin Powder: Gives the murukku a warm and aromatic flavor, enhancing its overall taste profile.
- Sesame Seeds or Omam: Adds a nutty and crunchy texture to the murukku, along with a subtle hint of flavor.
How To Make Baked Murukku?
For making baked murukku, follow these easy steps to get the perfect crunchy and flavorful snack.
- In a wide bowl, add cream, oil, red chili powder, turmeric powder, asafoetida powder, cumin powder, and sesame seeds, and mix well until combined. This step is important to ensure that all the flavors are well incorporated into the dough.
- Then, add rice flour and salt, and mix well with your fingertips until crumbled. This will help in achieving the right texture for the murukku.
- Add water little by little and mix well until you get a smooth dough. The amount of water can vary, so it's important to add it gradually to achieve the right consistency.
- Fill the murukku maker with the dough and press it into a spiral shape onto a greased mould. This step will determine the shape and size of the murukku, so pay attention to it.
- Brush the murukku with oil and then bake in a preheated oven at 180 degrees C for 20 to 25 minutes or until golden. Baking the murukku is crucial to achieve the crispy texture and perfect color.
- Once baked, let the murukku cool down before enjoying this delicious and crunchy snack.
By following these steps, you can make baked murukku at home and impress your family and friends with this flavorful treat.
Serving Suggestions
- Pair with tea or coffee: Baked murukku can be enjoyed with a hot cup of tea or coffee as a snack or even as a breakfast item.
- Serve with yogurt dip: A side of yogurt dip with some added spices and herbs can complement the flavors of the murukku and add a creamy element to the dish.
- Accompany with chutney or pickle: A tangy and spicy chutney or pickle can add an extra kick to the murukku and elevate the overall taste.
- Enjoy with a bowl of soup: Pairing the baked murukku with a warm and comforting bowl of soup can make for a satisfying and wholesome meal.
- Add to a chaat platter: Incorporate the baked murukku into a chaat platter along with other savory snacks for a variety of textures and flavors.
- Pair with a salad: Serve the baked murukku alongside a fresh and crunchy salad for a light and healthy meal option.

Tips for Baked Murukku
Preparation Duration:
- The preparation time for baked murukku is approximately 10-15 minutes, including the mixing of ingredients and shaping the dough.
- It is important to prepare the dough to the right consistency to ensure that the murukku holds its shape while baking.
Cooking Techniques:
- When baking murukku, it is crucial to preheat the oven to the specified temperature to ensure even baking.
- Placing the murukku on a lined baking tray and brushing them with oil will help them achieve a golden and crispy texture.
Importance of Garnishing:
- Garnishing the baked murukku with a sprinkle of sesame seeds or cumin seeds not only adds flavor but also enhances the presentation.
- The garnish also adds a touch of color and texture to the baked murukku, making them visually appealing and inviting.
By following these tips, you can create delicious and visually appealing baked murukku that will be a hit at any gathering or as a tasty snack at home.
Variations for Baked Murukku
- Flavor Variations: Experiment with different flavors by adding ingredients such as garlic powder, onion powder, or even curry powder to the dough for a unique taste.
- Spice Level: Adjust the spice level to your preference by increasing or decreasing the amount of red chili powder or adding other spices like black pepper or paprika.
- Nutty Twist: Add a crunchy texture by incorporating crushed peanuts or cashews into the dough for a nutty flavor.
- Herbs and Seeds: Enhance the flavor by including herbs like dried fenugreek leaves or adding various seeds like flaxseeds or poppy seeds for a twist.
- Gluten-free Option: For a gluten-free version, substitute the rice flour with other gluten-free flours such as chickpea flour or millet flour.
- Sweet Murukku: For a sweet variation, reduce the amount of spices and add a hint of sweetness by including powdered sugar or jaggery in the dough for a delightful dessert option.
How to Store Baked Murukku
Proper storage is essential to maintain the freshness and flavor of your baked murukku. Here are some simple storage tricks to keep them crispy and delicious:
- Airtight Container: Store the baked murukku in an airtight container to prevent them from becoming soggy. Make sure the container is completely sealed to keep the moisture out.
- Cool, Dry Place: Keep the container in a cool, dry place away from direct sunlight and heat. Exposure to heat and humidity can cause the murukku to lose its crunchiness.
- Use Desiccants: If you live in a humid climate, consider adding desiccants like silica gel packs to the container. These will help absorb any excess moisture and keep the murukku crispy.
- Separate from Other Snacks: If storing other snacks in the same container, make sure to keep the murukku in a separate section or use a divider. This will prevent the flavors from mixing and keep the murukku fresh.
- Check for Moisture: Periodically check the stored murukku for any signs of moisture or sogginess. If needed, transfer them to a new container and add fresh desiccants.
- Use it within a Week: Baked murukku is best enjoyed fresh, so try to consume it within a week of baking for the best taste and texture.
By following these storage tips, you can ensure that your baked murukku stays crispy and delicious for as long as possible.
Frequently Asked Questions (FAQs)
Can I use store-bought rice flour for making baked murukku?
- Yes, you can definitely use store-bought rice flour instead of making it at home. Just make sure to use a fine-textured rice flour for the best results in your baked murukku.
How can I adjust the spice level in the baked murukku?
- If you prefer a spicier taste, you can increase the amount of red chili powder in the recipe. Conversely, if you prefer a milder flavor, you can reduce the quantity of red chili powder according to your preference.
Can I make the baked murukku without a murukku maker?
- If you don't have a murukku maker, you can use a piping bag with a star-shaped piping tip to create the spiral shape of the murukku. It may take a little more time and effort, but it will work just as well.
How should I store the baked murukku?
- Once the baked murukku has completely cooled down, store it in an airtight container to maintain its crispiness. It can be stored at room temperature for up to 2 weeks.
Can I make the baked murukku in advance?
- Yes, you can definitely make the baked murukku in advance. It is a great snack to prepare ahead of time for parties, festivals, or simply for enjoying as a tea-time snack.
Can I freeze the baked murukku?
- Yes, you can freeze the baked murukku in an airtight container for up to 2 months. To enjoy them again, simply reheat them in a preheated oven at 180 degrees C for a few minutes until they are crisp again.
Recipe Card
Baked Murukku/Chakli 2020-09-25 04:35:04

Baked Murukku/Chakli
Serving size:20 t0 25 murukku
Prep Time: 00:10
Cook Time: 00:25
Ingredients
- 2 cups rice flour
- 7 tbsp fresh cream
- 1 tbsp oil
- 2 tsp red chilli powder
- 1/2 tsp turmeric powder
- 1 tsp cumin powder
- 2 tsp sesame seeds or omam
- 1/2 tsp asafoetida/hing powder
- to taste salt
- as needed water
- for brushing oil
Instructions
- In a wide bowl, add cream, oil, red chili powder, turmeric powder, asafoetida powder, cumin powder and sesame seeds, mix well until combined.
- Then add rice flour and salt.
- Mix well with your fingertips until crumbled.
- Then add water little by little and mix well until you get a smooth dough.
- Place a star plate or murukku plate in the murukku maker. Grease it with oil.
- Fill the mould with enough dough and cover the rest of it with a moist cloth.
- Now close the murukku machine.
- Take a murukku press machine and start making murukku from the center and press into a spiral shape in 3 rounds and then cut them and join the last round as shown in the video.
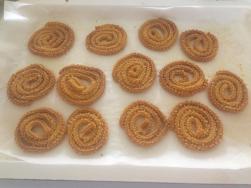
- Line a baking tray with baking paper and then place all the chaklis as shown in the picture.
- Brush them with oil.
- Meanwhile, preheat your oven to 180 degrees C.
- Place the baking tray in the preheated oven and bake for 20 to 25 mins or till golden.
- Let the murukku cool down. Now your baked chakli/murukku is ready to eat.
By Santhi Therese
The Indian Claypot
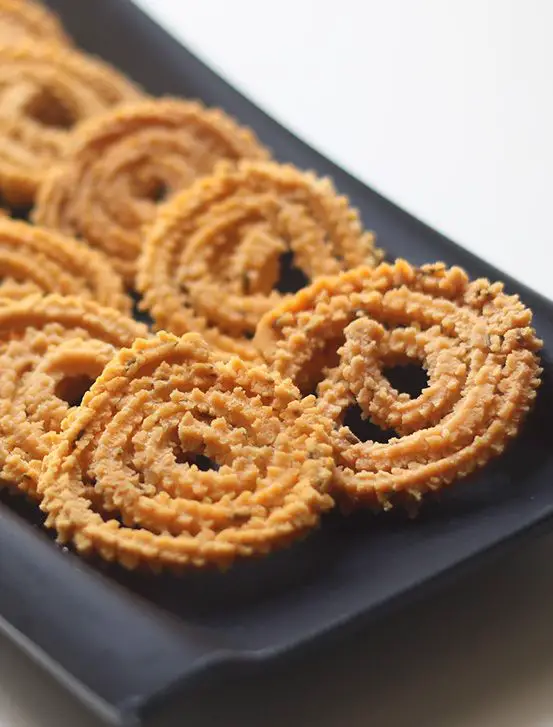
Step-By-Step Instructions:
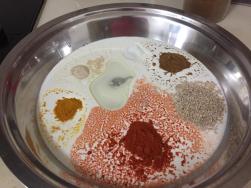
In a wide bowl, add cream, oil, red chili powder, turmeric powder,
asafoetida powder, cumin powder and sesame seeds,
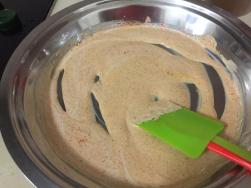
mix well until combined.
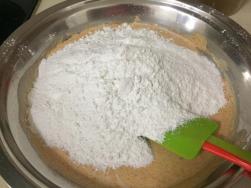
Then add rice flour and salt.
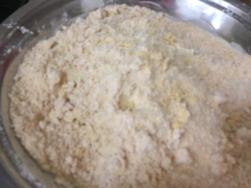
Mix well with your fingertips until crumbled.
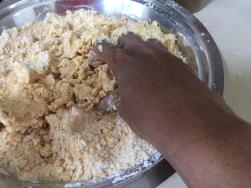
Then add water little by little
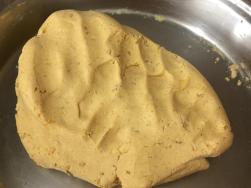
and mix well until you get a smooth dough.
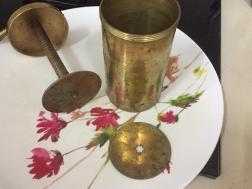
Place a star plate or murukku plate in the murukku maker.
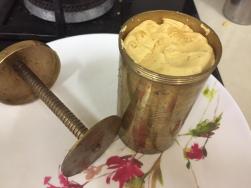
Fill the mould with enough dough
Now close the murukku machine. Take a murukku press machine
and start making murukku from the center and press into a spiral shape in 3 rounds and then cut them and join the last round as shown in the video.
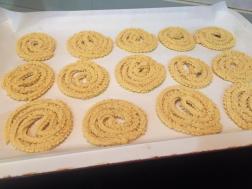
Line a baking tray with baking paper and then place all the chaklis as
shown in the picture.
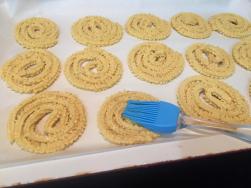
Brush them with oil.
Meanwhile, preheat your oven to 180 degrees C. Place the baking tray
in the preheated oven and bake for 20 to 25 mins or till golden.
Let the murukku cool down. Now your baked chakli/murukku
is ready to eat.

